POP3/IMAP setup

General information for setup

Alternative Ports if the above does not work

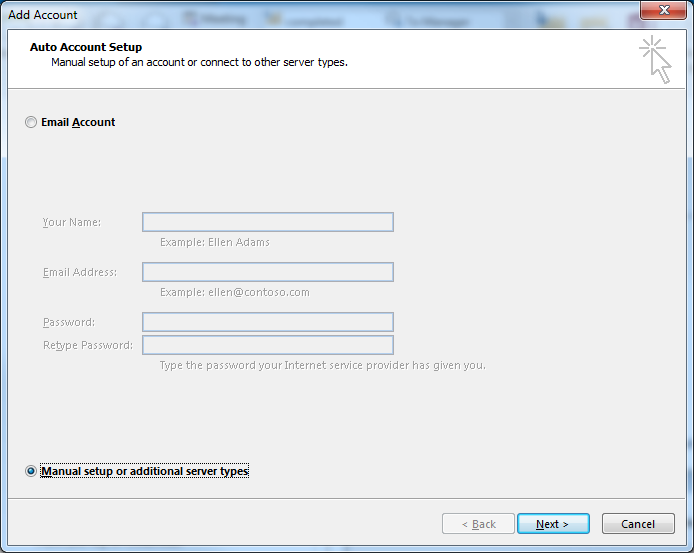
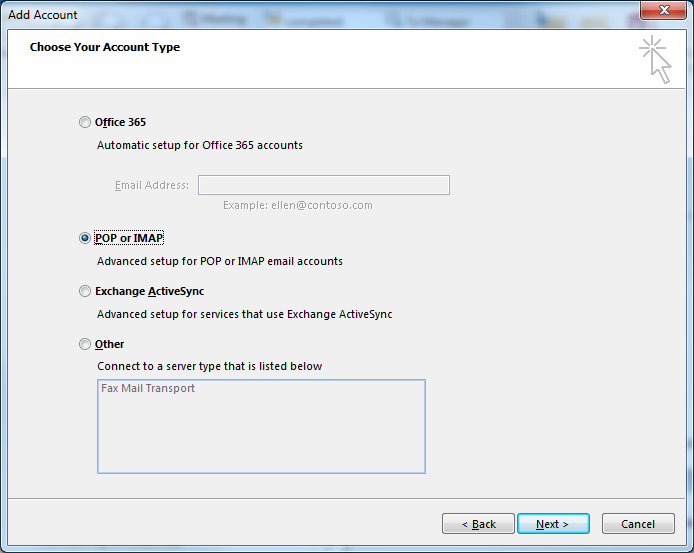
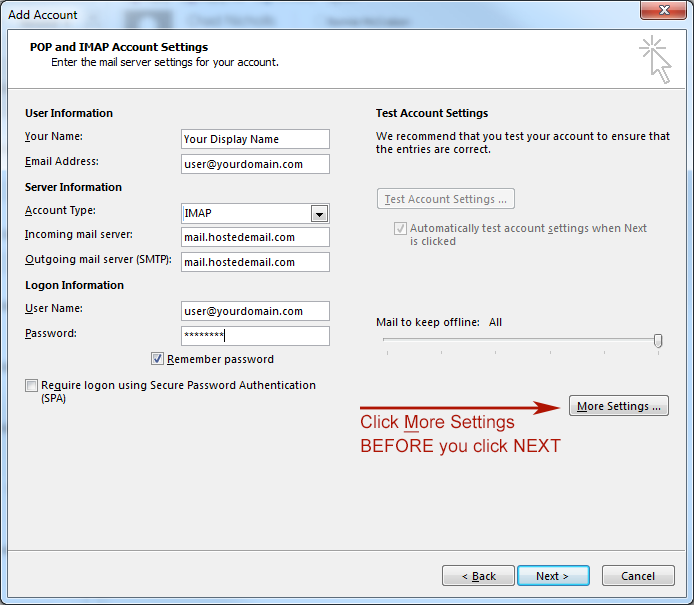
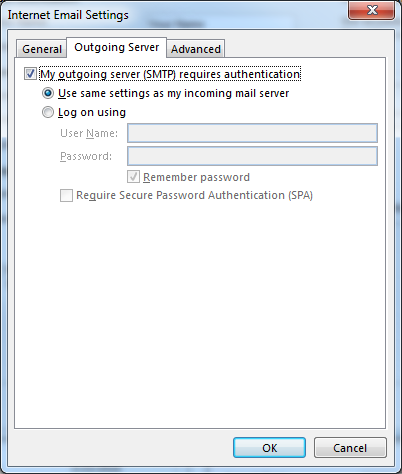
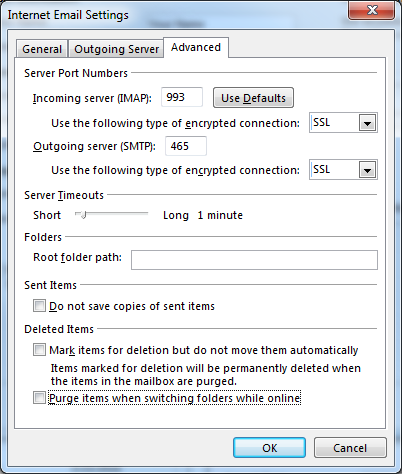
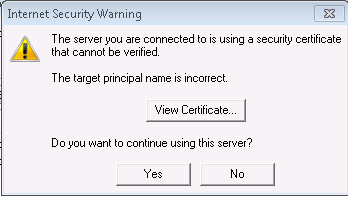
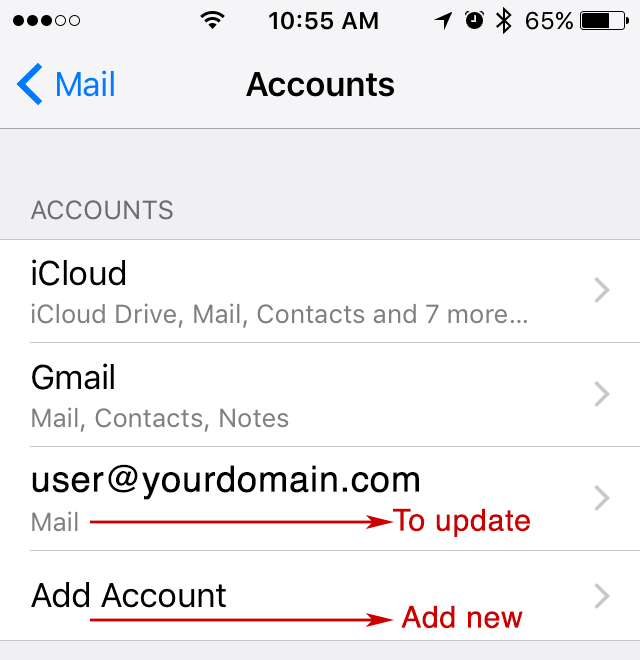
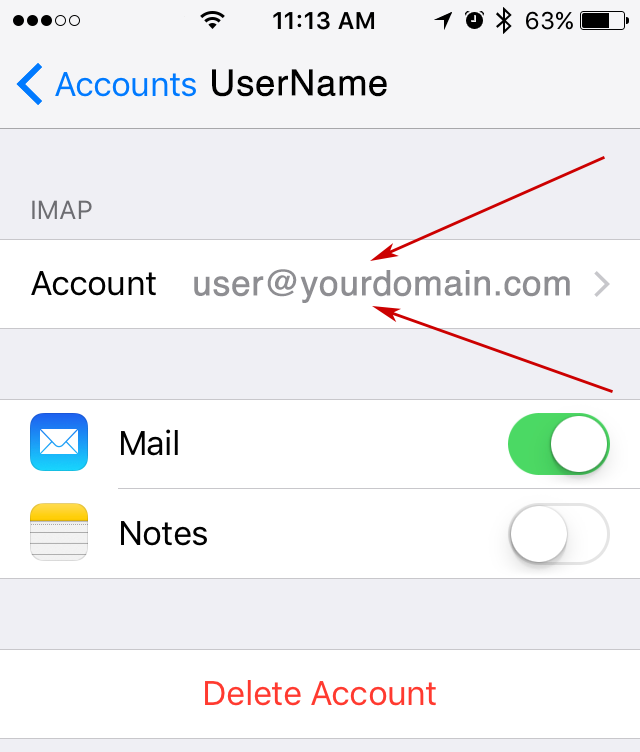
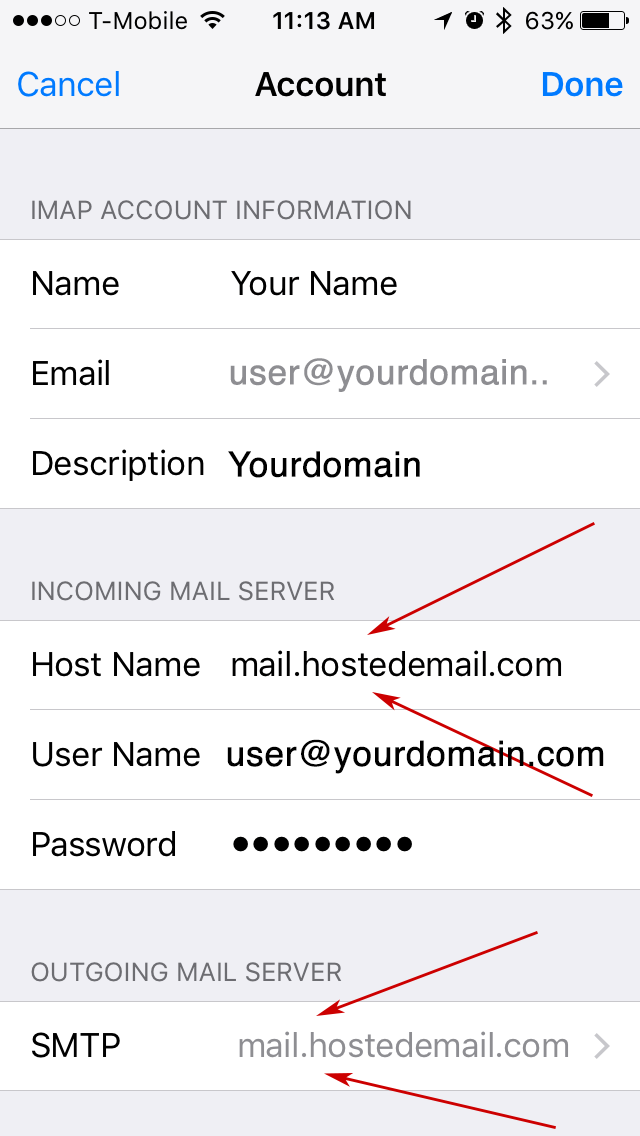
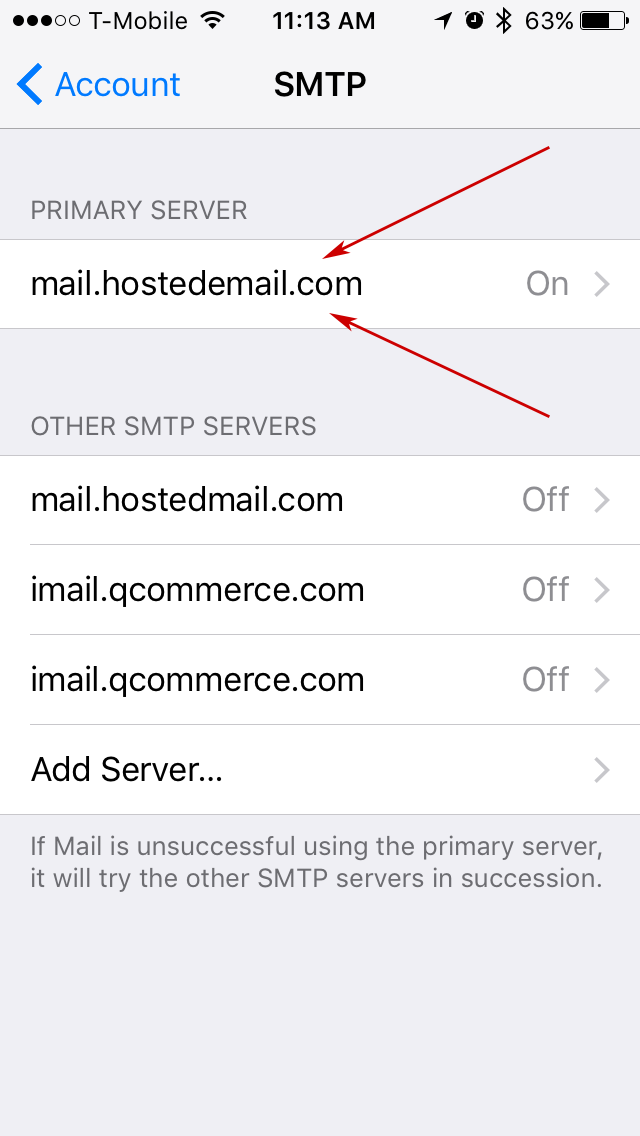
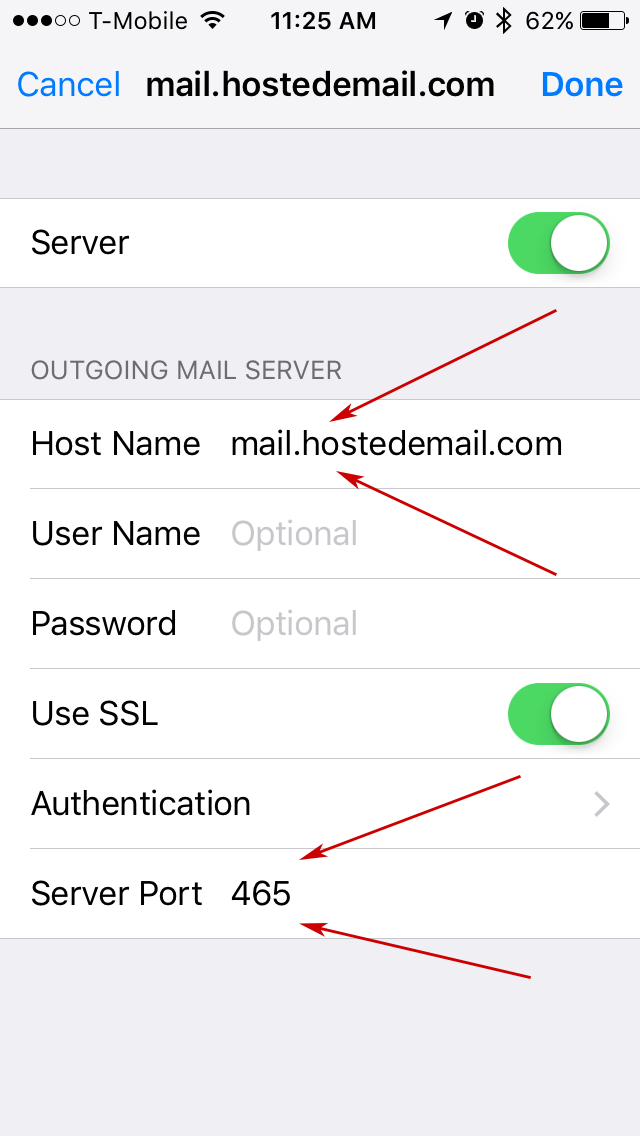
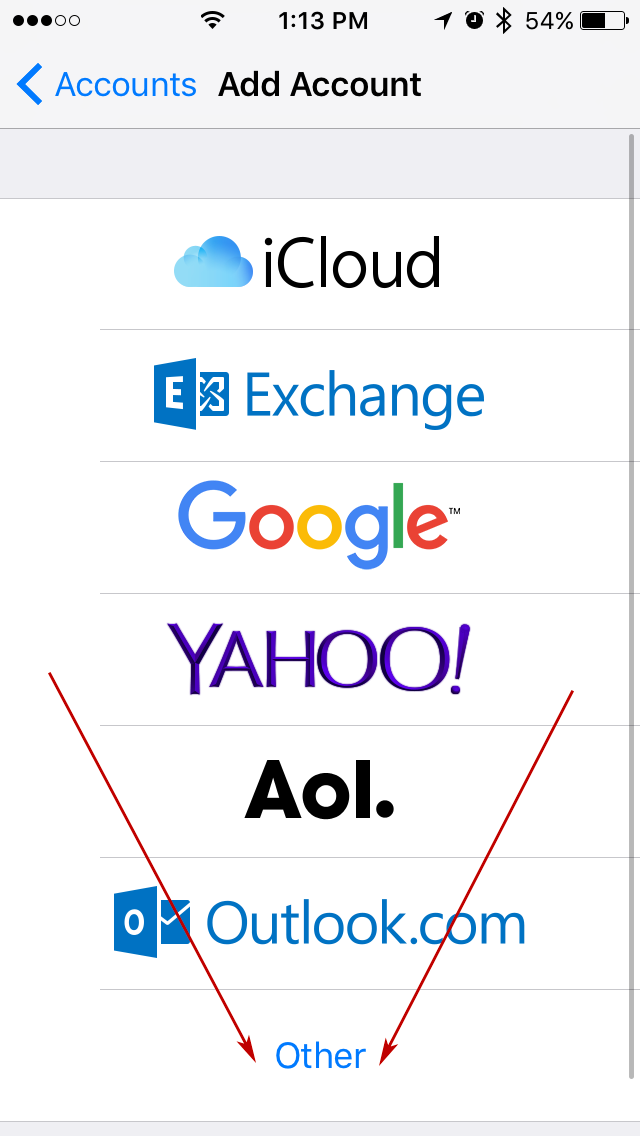
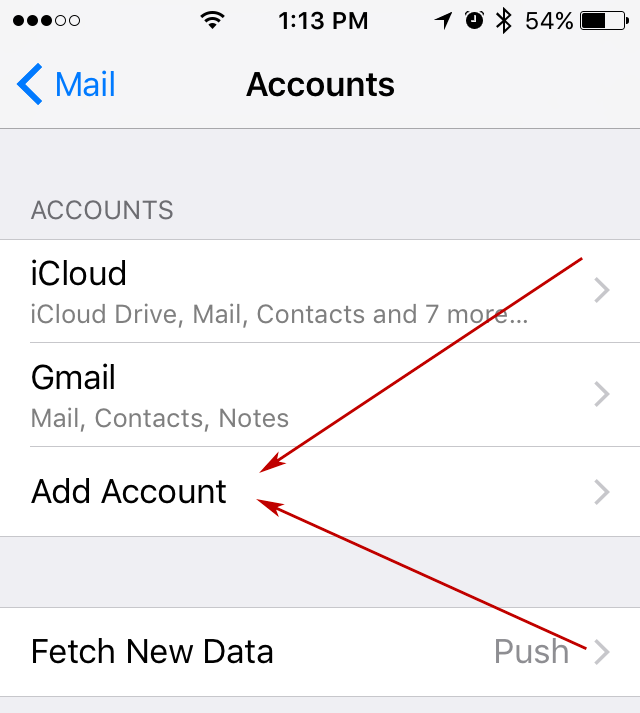
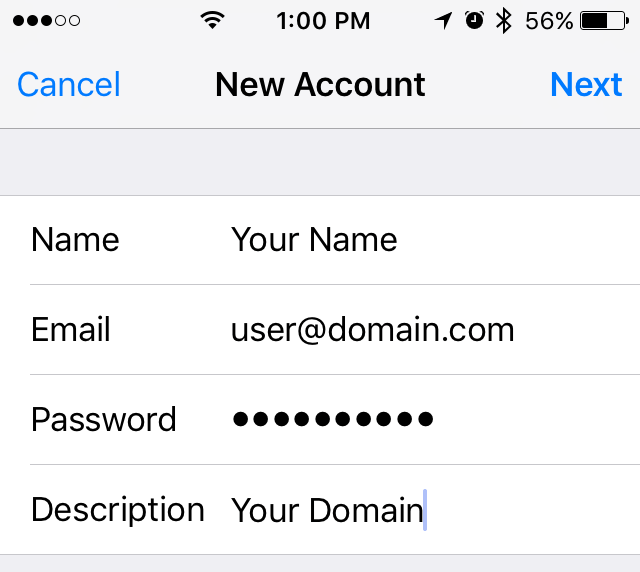
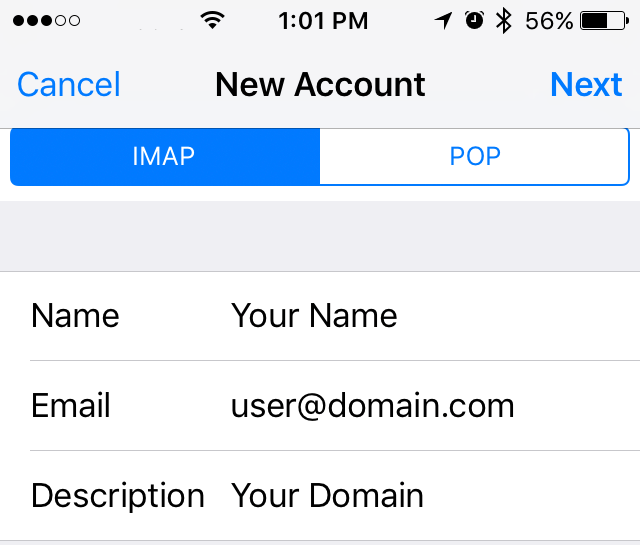
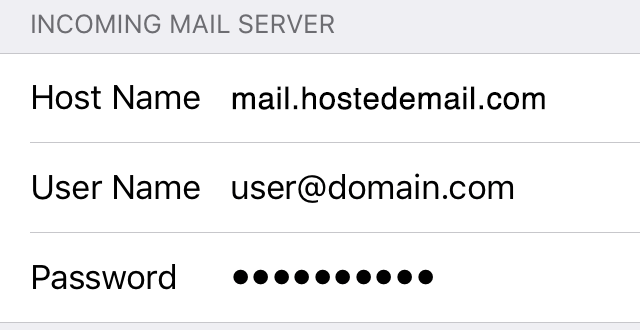
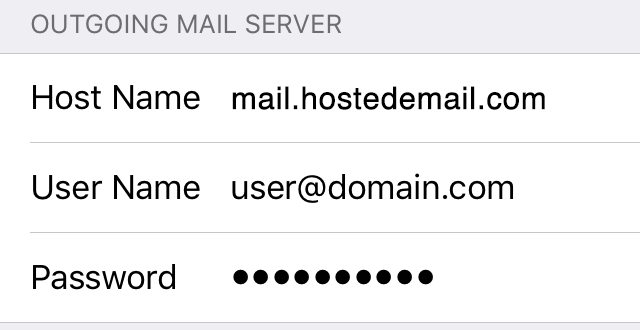
See below for Microsoft Outlook screenshots and iPhone screenshots.

Microsoft Outlook screenshots

Look at Microsoft's website if below does not match your version and/or you need more help.
Pictures may vary slightly due to version of Outlook.

  1. Go to File and select Account Information
    click on file.
     
  2. To update existing email (to add an account scroll down to step 4):
    Click on account settings and from the drop menu click account settings
    account settings
     
  3. Select the email account you want to change, and then choose Change.
    update
     
  4. To add account (skip to step 7 if you are updating an account):
    Under Account Information click on +Add Account
    click add account.
     
  5. Choose Manual Setup followed by the Next button.
    manual setup
     
  6. Select POP or IMAP followed by the next button.
    POP or IMAP
     
  7. Add/modify account information, then click on the more settings button.
    • Your Name: How you want your name to appear in the from line of your emails.
    • Email Address: username@yourdomain.com
    • Account Type: IMAP
    • Incoming mail server: mail.hostedemail.com
    • Outgoing mail server (SMTP): mail.hostedemail.com
    • User Name: username@yourdomian.com
    • Password: check with your administrator if you do not have
    • Click on More Settings
    add user info then click on more settings.
     
  8. On the Outgoing Server tab click on My outgoing server (SMTP) requires authentatication
    click my outgoing server requires authentication.
     
  9. On the Advanced tab change the ports and then the OK button.
     
    • Incoming server (IMAP): 993
    • Use the following type of encrypted connection: SSL
       
    • Outgoing server (SMTP): 465
    • Use the following type of encrypted connection: SSL
    • Click OK


      If you run into problems you can try one of these other ports:
       
      • Incoming server (IMAP): 143
      • Use the following type of encrypted connection: None
         
      • Outgoing (SMTP): 25, 587 or 8025
      • Use the following type of encrypted connection: None
         
      • Incoming server (POP3) [not recommended]: 995
        Use the following type of enctrypted connection: SSL

        or

      • Incoming server (POP3) [not recommended]: 110
      • Use the following type of encrypted connection: None
         
    set ports.
     
  10. You will be returned to Account Settings window. Click on the Test Account Settings
    • If you see the below warning select Yes
      click yes
    • Your test should complete successfully, let us know if you run into problems

iPhone Screenshots

  1. Go to settings
    click on settings
     
  2. Scroll down to mail
    click on email
     
  3. Click on your existing email to Update or click Add Account to add for the first time.
    If updating account go to step 4, to add account scroll down to step 8.
     
    click on add an account
     
  4. Click on your Account name
    click on your email
     
  5. Update the host name, then click on the SMTP
    update host name
     
  6. Click on the Primary Server
    smtp
     
  7. Verify the host name and server port
    Port 465 requires SSL
    Port 25, 587and 8025 turn off SSL
    outgoing
     
    You should now be finished with updating account.


  8. To add account select on Other
    click on other
     
  9. Click on Add Account
    click on add an account
     
  10. Choose Add Mail Account
    click on add an account
     
  11. Enter information then click next
    • Enter Name: How you want your name to appear in the from line of your emails
    • Email: username@yourdomain.com
    • Password: check with administrator if you do not have
    • Description: How you will recognize this account
    • Click Next
    User information first page
     
  12. Enter information again
    • Enter Name: How you want your name to appear in the from line of your emails
    • Email: username@yourdomain.com
    • Password: check with administrator if you do not have
    • Description: How you will recognize this account
    Renter user information
     
  13. Incoming Mail Server
    • Host Name: mail.hostedemail.com
    • User Namel: username@yourdomain.com
    • Password: check with administrator if you do not have
    Renter user information
     
  14. Outgoing Mail Server
    • Host Name: mail.hostedemail.com
    • Email: username@yourdomain.com
    • Password: check with administrator if you do not have
    Renter user information
     
  15. Click Next
    • Your phone will now verify the account
    • Your test should complete successfully, let us know if you run into problems